A split or poorly sealed intake hose can let dust enter an excavator engine after the air filter, while a soft or internally damaged hose can restrict airflow under load. Both conditions may look like a clogged filter, turbocharger problem or fuel fault. This guide organizes excavator air intake hose inspection, fault isolation and replacement identification without assuming that a hose fits from machine model wording alone.
Map the hose position before diagnosing symptoms
Identify whether the suspect hose is upstream or downstream of the air cleaner. A leak before the filter can draw air from an unintended location, but a leak on the clean side can bypass filtration and expose the turbocharger and engine to dust. Trace the complete route from pre-cleaner or inlet, through the air-cleaner housing, restriction indicator and outlet duct, to the turbocharger or intake manifold.
Caterpillar describes an air-cleaner intake hose as the conduit that carries filtered air toward the engine. Its Cat dimensions do not transfer to a Hitachi hose, but the stated function explains why clean-side sealing matters. Photograph every joint, clamp, support and sensor branch before disturbing the assembly.
| Observed symptom | Hose-related possibility | Other causes to separate |
|---|---|---|
| Dust trace after filter | Crack, loose clamp or damaged sealing end | Poor filter seating or damaged housing |
| Power loss under load | Hose collapse or internal delamination | Filter restriction, turbo or fuel fault |
| Whistle or suction noise | Small split or joint gap | Normal turbo noise or another intake joint |
| Oil mist around joint | Loose connection or hose deterioration | Breather or turbocharger condition |
Inspect the clean side without adding contamination
Park safely, lower the attachment, stop the engine and prevent starting. Let hot parts cool. Clean the exterior before opening any clean-side connection. Cover the turbo or manifold opening immediately with an approved clean cap; do not use loose shop cloth that can shed material or be drawn into the engine.
Use strong side lighting while flexing only as the service procedure permits. Look between corrugations and around molded bends for hairline cracks, shiny rub marks, soft spots, hardening, blistering and exposed reinforcement. Inspect the inner wall for loose layers or distortion. Check clamps for the correct type, range and position, and inspect rigid pipes for burrs or corrosion that could damage a replacement.
Caterpillar’s air-inlet commissioning guidance emphasizes cleanliness, joint inspection and continuous clamping. It applies to a different installation, so use its principles rather than its dimensions or clamp specification.
Measure restriction and separate the filter from the hose
Visual dirt on a filter does not prove that it has reached its service limit. Use the engine manufacturer’s specified restriction test point, operating condition, instrument and limit. Record the reading before disassembly and compare it after any controlled repair. If restriction rises mainly under load, inspect for a hose that softens or collapses as suction increases.
Donaldson’s air intake product guide recommends servicing filters by restriction rather than appearance and notes that readings belong on the clean side. The machine or engine manual still controls the actual limit and test condition.
| Check | Evidence to record | Decision supported |
|---|---|---|
| Filter restriction | Specified condition and measured value | Filter loading versus downstream fault |
| Hose shape under demand | Controlled observation from a safe position | Collapse or delamination |
| Clean-side dust | Location and pattern before cleaning | Leak path downstream of filter |
| Clamp witness marks | Position, tightening range and pipe engagement | Joint movement or poor sealing |
| Restriction indicator | Reset and approved function check | False warning versus actual restriction |
Identify geometry instead of ordering by appearance
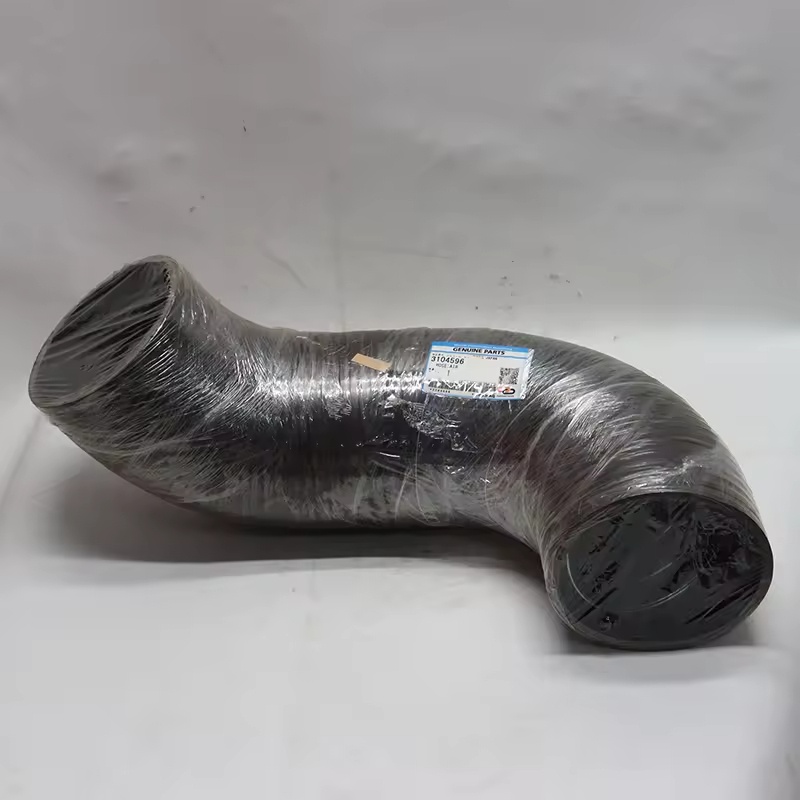
Hongtengda lists a Hitachi ZAX450-3 / ZAX470-3 air intake hose associated with 3104596 and a separate Hitachi EX1200-6 hose associated with 3110625. Their curved appearance does not make them interchangeable. Use the plastic pipe product category only to find enquiry candidates.
Record the machine model and complete serial number, engine model, old hose number and every molded marking. Photograph the hose installed, then place the removed hose in its natural shape beside a scale. Document end inside diameters, sealing lengths, bend directions, branch ports, clamp positions and nearby clearances. Do not force a hose to match a different bend; stored stress can pull it off a joint or make it rub.
Install without damaging the filtration boundary
Compare the new and old hose on a clean surface. Confirm both ends, bend orientation, wall support, branches and markings. Inspect mating pipes and air-cleaner outlets for distortion. Install with no twist, stretch or contact with sharp edges. Position supports and clamps exactly as specified, then verify that engine movement cannot pull the hose or close a clearance.
Keep clean-side openings exposed for the shortest possible time. Cat’s mini excavator air-filter guidance reinforces careful air-system service, though the exact access and interval differ on Hitachi machines. If dust passed the filter, follow the engine manufacturer’s contamination inspection instead of fitting a hose and immediately returning the excavator to heavy load.
| RFQ field | Evidence to send | Why it matters |
|---|---|---|
| Machine identity | Model and full serial plate | Separates production variants |
| Engine and air path | Engine plate and installed-route photos | Identifies connection position |
| Hose identity | All molded numbers and label photos | Supports direct comparison |
| Interfaces | Both ends, branches, bends and clamp seats | Prevents geometry mismatch |
| Failure evidence | Crack, rub, collapse and restriction record | Supports root-cause correction |
Commission with a sealed-air-path record
Before starting, remove every protective cap and tool, confirm the filter is seated and reset the indicator only by the approved method. Start the engine and inspect from a safe position for abnormal noise, movement and joint leakage. Perform the specified restriction check under the required condition, then compare engine response with the pre-repair record.
After warm-up, stop and recheck clamp position, rub clearance and hose shape. Use the Hongtengda contact page to send the serial, markings and interface package for written comparison. Release the machine only when the intake remains sealed, restriction is within the correct limit and any clean-side contamination has been addressed.