A restricted cabin filter can reduce airflow, make windows harder to clear and load the heating and air-conditioning blower. A poorly fitted filter can also let dust bypass the element and enter the cab. Because visually similar panels can use different seals or dimensions, excavator cabin air filter replacement should include airflow diagnosis and fitment evidence rather than a model name alone.
Separate a loaded filter from other airflow faults
Ask the operator whether airflow is weak at every vent, only in recirculation or only in fresh-air mode. Record blower noise, speed settings, dust entry, odor and window-demisting performance. A loaded element is common, but a blocked intake screen, debris in the housing, a damaged blower, a stuck door actuator or an electrical speed-control fault can produce similar symptoms.
Caterpillar’s large-excavator maintenance guidance identifies cabin air filters among normal service points and directs owners to the Operation and Maintenance Manual for intervals. Use the Hitachi manual for the machine being serviced; site dust and cab conditions can justify inspection earlier than a calendar interval.
| Observation | Possible cause | Next check |
|---|---|---|
| Weak airflow at all speeds | Loaded filter or blocked intake | Compare airflow with filter and housing inspected |
| Noise but little air | Debris near blower or damaged fan | Inspect housing without reaching into moving parts |
| Dust streaks around filter | Seal bypass or incorrect element | Check foam contact and housing latch |
| One mode weak | Door, actuator or separate fresh/recirculation filter | Trace each airflow path |
| Persistent odor | Moist debris, evaporator contamination or drain issue | Inspect HVAC housing and drain by manual procedure |
Open the housing without adding contamination
Park safely, lower the attachment, stop the machine and isolate the blower. Wear protection suitable for the dust. Follow safe access practices and the machine manual; the HSE’s maintenance guidance stresses isolation and safe working arrangements.
Clean loose debris around the cover before opening it. Note the old filter’s orientation and any airflow arrow. Remove it without shaking accumulated dust into the clean side of the housing. Vacuum or clean the compartment only by an approved method, keeping debris away from the blower and evaporator. Do not run the HVAC system with the element removed unless the manufacturer specifies a test procedure.
Inspect the old element and sealing path
Look for torn pleats, crushed corners, oil, moisture, mold, missing foam and dust tracks beyond the sealing edge. A dirty face shows that the filter is capturing material; a clean streak around the perimeter can show bypass. Check that the cover latches evenly and that the housing is not warped or packed with debris.
Caterpillar advises handling a new element carefully, keeping it packaged until installation, inspecting it for damage and confirming that it seats and seals correctly in its cabin filter replacement guidance. The same general practices apply, while the Hitachi element and housing define the actual orientation and fit.
Use the removed element as evidence rather than trying to make it look reusable. Tapping or blowing a pleated cabin filter can damage media, drive fine dust deeper into the element and expose the technician to collected material. Place it in a bag after inspection. If oil or coolant is present, find the source before fitting a clean element. If water entered through the intake, inspect seals, drain paths and exterior covers.
Cab pressure and door sealing influence dust entry too. A new filter will not correct a damaged door seal, open floor boot or HVAC case leak. With the cab closed and blower operating as specified, check whether air enters through intended vents and whether dust trails appear at unrelated openings. Record these findings separately from filter condition.
| Inspection point | Accept condition | Reject evidence |
|---|---|---|
| Pleats | Even, intact and dry | Tears, collapse, oil or moisture |
| Foam frame | Continuous and resilient | Gaps, compression set or detached foam |
| Housing | Clean, undamaged sealing ledge | Warping, broken latches or packed debris |
| Clean side | No dust trails beyond seal | Visible bypass path |
| Air path | Intake and drain clear | Obstruction, standing water or biological growth |
Match dimensions, seal and airflow direction
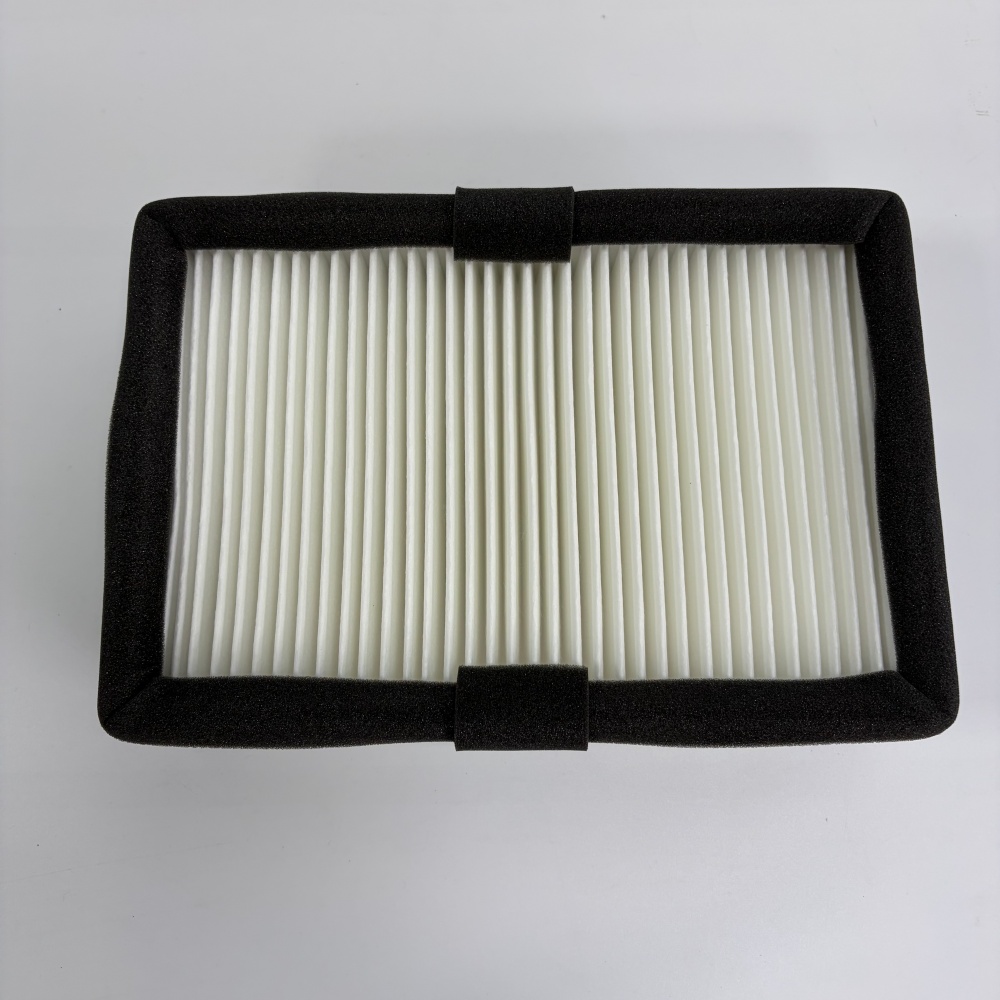
The catalog includes a Hitachi ZAX490-5A YA00022308PY cabin filter and a separate ZAX490-5A YA000001490PY cabin filter. The shared machine wording does not prove the elements interchange or occupy the same fresh-air or recirculation position. Compare the original number, housing position, overall length and width, element thickness, corner shape, foam placement and airflow marking.
The filter cartridge category provides current enquiry candidates. Send a straight-on image of both faces, the edge profile and the housing opening. Include a ruler for scale but also state measured dimensions. If the old filter has no readable number, provide the machine model, complete serial number and HVAC housing details.
Ask the supplier to confirm the element number used for the quotation, overall dimensions, seal position and whether the product is intended for fresh-air or recirculation service. Packaging matters because crushed pleats and compressed foam can make a correctly numbered element unusable. Receiving staff should compare the new part while it is still clean and retain the label with the service record.
This video is explicitly about changing a cab filter on an excavator. It illustrates the service context, but the access point, orientation and element identity must come from the manual and original filter for the Hitachi machine.
Install and verify airflow without damaging the media
Keep the new filter in its packaging until the housing is ready. Hold it by the frame rather than pressing the pleats. Follow the airflow arrow, seat the foam evenly and close the cover without forcing it. If the latch does not close naturally, stop and compare the element again. Cat’s filter inspection guidance distinguishes fresh-air and recirculating cabin filters and recommends replacement when dirty rather than destructive cleaning.
Run the blower through every speed and mode. Check airflow at representative vents, listen for contact or vibration, and inspect for air leakage around the cover. Verify heating, cooling and window-clearing performance as conditions allow. Record the date, machine hours, element number, housing position and site condition.
If airflow remains weak, do not stack another filter or cut the frame to increase flow. Continue diagnosis at the intake screen, blower wheel, evaporator face, blend doors and electrical speed controls. A pressure or airflow measurement is useful only when the test method and comparison point are recorded. The machine manual should define any access that exposes moving HVAC components.
| RFQ or service field | Evidence to keep | Purpose |
|---|---|---|
| Machine identity | Model and complete serial plate | Separates cab and production variations |
| Original element | Part number and both faces | Confirms identity and airflow direction |
| Geometry | Length, width, thickness and corner shape | Prevents a near-size mismatch |
| Seal | Foam location and housing ledge | Prevents dust bypass |
| Result | Blower modes, airflow and dust-path inspection | Confirms the repair addressed the complaint |
Finish with a clean-side handover record
Photograph the correctly installed element before closing the housing. Note any separate filter still due for service and any blower, actuator or drain fault discovered. Use the Hongtengda contact page to send the serial plate, original part number, dimensions and seal photos for a written comparison before ordering.