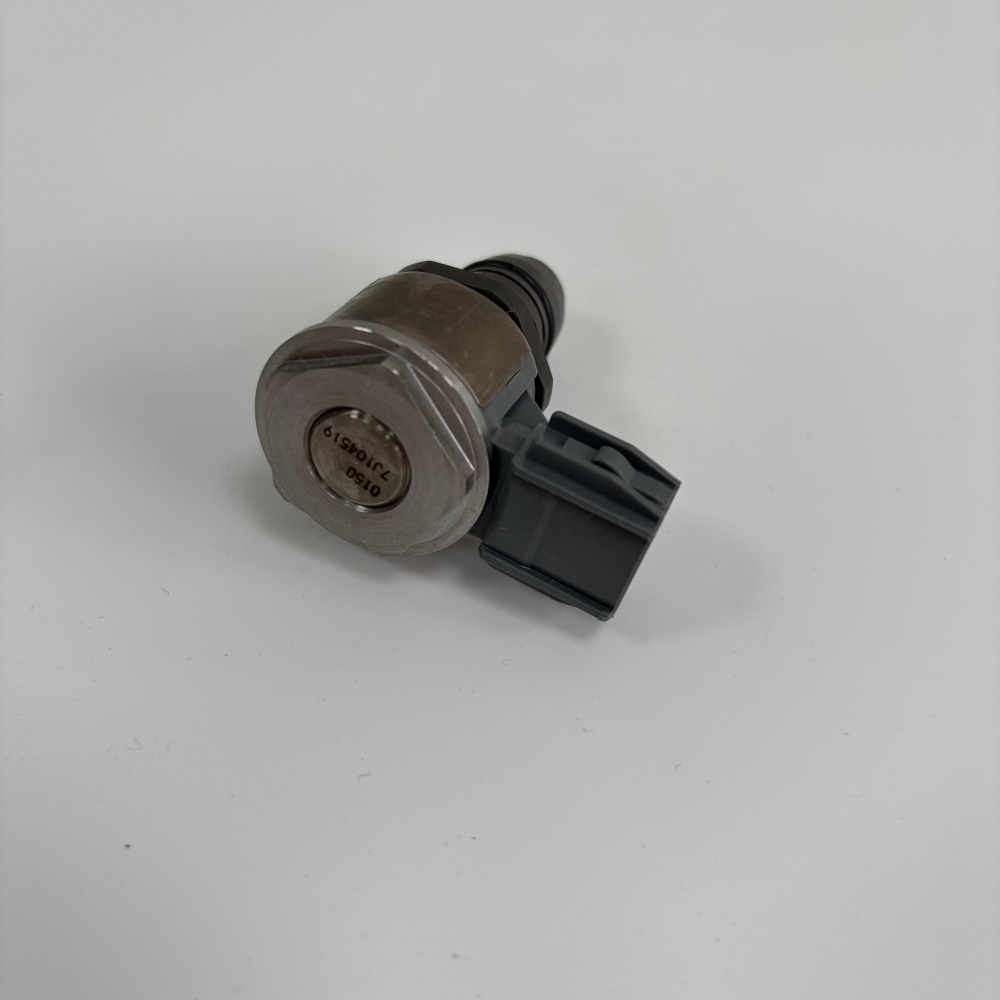
An excavator common rail pressure relief valve diagnosis must begin by identifying the component and the fuel-system design. Some rails use a mechanical pressure-limiting valve as protection. Others use an electronically controlled pressure-control valve, and system layouts can place control functions at the pump or rail. A similar body or shared model name does not prove function, calibration, connector, or fitment.
Low rail pressure, high rail pressure, hard starting, derate, rough running, leakage, or a diagnostic code can involve the valve, but they can also result from low-pressure fuel supply, restricted filters, air entry, injector return, pump wear, sensor bias, wiring defects, contaminated fuel, or incorrect control commands. Replacing the rail valve before testing these paths often wastes the part and leaves the actual fault unchanged.
Understand the pressure-control system
A common-rail system uses a high-pressure pump, rail, pressure sensing, control devices, high-pressure lines, and injectors. The rail stores pressurized fuel and supplies the injectors. The controller compares desired and measured rail pressure and manages the relevant actuators. Bosch’s official common-rail system overview explains this general arrangement.
Because pressure regulation is a system function, one pressure code is not a component verdict. The diagnostic plan must compare commanded pressure, measured pressure, actuator commands, low-pressure supply, leakage or return behavior, engine speed, and operating condition. The exact engine service information defines test points and safe limits.
Observe high-pressure fuel safety
Common-rail fuel can penetrate skin and cause severe injury. Never loosen a high-pressure line on a running or recently stopped engine to “see whether fuel comes out.” Follow the manufacturer’s shutdown and pressure-release procedure, wear specified protective equipment, and use approved gauges, adapters, shielding, and diagnostic tools. Seek immediate medical attention for suspected injection injury.
Keep the work area extremely clean. Cap openings with compatible clean caps, not shop rags. Do not reuse a high-pressure pipe, seal, or fastener when the service manual prohibits reuse. Keep ignition sources away and collect fuel safely.
Confirm the complaint with scan data
Record all codes and freeze-frame data before clearing them. Monitor desired rail pressure, actual rail pressure, engine speed, battery voltage, fuel temperature, and pressure-control commands during cranking, idle, acceleration, and the fault condition as the manual permits. Graphing data is more useful than watching isolated numbers because it shows direction, delay, oscillation, and recovery.
| Data pattern | Possible directions | Next check |
|---|---|---|
| Actual pressure remains low | Low supply, leakage, excess return, pump output, control valve | Low-side tests and approved return/leak tests |
| Actual pressure overshoots | Control response, wiring, sensor bias, restriction | Command comparison, circuit and sensor validation |
| Pressure oscillates | Air, unstable control, intermittent circuit, mechanical fault | Fuel quality, supply vacuum, wiring and graph correlation |
| Desired and actual agree but symptom remains | Fault outside rail-pressure control | Continue full engine diagnostic tree |
Test the low-pressure supply first
A high-pressure pump cannot work correctly without clean, air-free fuel at the specified inlet condition. Inspect fuel level, tank vent, water separator, filters, hoses, clamps, pickup, transfer pump, and return routing. Look for collapsed hoses, wet connections, loose fittings, restriction, aeration, or contaminated fuel. Measure supply pressure or inlet restriction with the specified equipment and conditions.
If the machine uses an electric supply pump, verify voltage and ground under load as well as delivered pressure and flow by the official procedure. The excavator electric fuel transfer pump testing guide gives a structured low-side check. Correct low-side problems before judging high-pressure components.
Distinguish leakage from insufficient pump delivery
Low rail pressure can occur because the pump cannot supply enough fuel or because fuel escapes through injectors, a control device, pressure-limiting path, or external leak. Use only the approved return-flow, leak-off, isolation, or pressure-decay tests. Test results depend on fuel temperature, engine speed, test duration, command state, and the specific system.
Inspect removed fuel and filters for water, corrosion, or metallic debris. Metal contamination can spread through the pump, rail, lines, injectors, and valves. Replacing one valve in a contaminated system can lead to immediate repeat failure. Follow the manufacturer’s contamination repair scope, which may require several components and controlled flushing or replacement.
Bosch’s high-pressure pump information illustrates the pump’s role in generating rail pressure. It does not supply model-specific diagnosis or limits for a Caterpillar application, so the serial-specific manual remains essential.
Inspect the valve and its electrical circuit
First determine whether the suspect is a passive pressure-limiting valve or an electrically controlled valve. If it has a connector, obtain the circuit diagram and identify power, ground, control, and monitoring paths. Inspect terminal tension, seals, corrosion, fuel intrusion, harness chafing, heat exposure, and previous repair. Test loaded voltage drop and circuit integrity with approved breakout equipment.
Do not apply direct battery voltage, guess a duty cycle, or perform an improvised bench activation. Coil resistance alone does not prove hydraulic operation, and a resistance value from another engine family is unsafe. If the component is mechanical, do not judge calibration by pushing or modifying its internal element. Follow the specified test or replace it only after the surrounding evidence supports that decision.
| Finding | Interpretation limit | Required corroboration |
|---|---|---|
| Electrical code | May involve valve, connector, harness or controller | Pinpoint circuit tests |
| Fuel at return path | May be normal or abnormal depending on design and state | Specified test condition and limit |
| Low rail pressure | Does not identify the leaking or weak component | Supply, pump and return/leak evidence |
| Metal on component | May indicate system-wide contamination | Filter, pump, rail and injector inspection plan |
| New valve changes symptom | Does not prove root cause if contamination or wiring remains | Full post-repair verification |
Use catalog numbers as inquiry clues
Hongtengda lists a CAT 545-9966-associated common-rail pressure valve. The listing and photograph help start an inquiry, but the complete machine serial number, engine arrangement, rail number, old-valve marking, connector face, and dimensional interfaces are still needed. A product title should never override serial-specific service and parts information.
Photograph the old component before cleaning it, including all markings, connector keying, threads or sealing face, length, and its installed rail position. Record the code and test results that led to removal. This gives the supplier evidence to compare and gives the workshop a defensible repair record.
Install without introducing contamination
Work in a clean controlled area. Keep protective caps fitted until the moment of assembly. Inspect the rail port and mating surfaces as the manual directs. Use the specified new seal or high-pressure line where required, and never add tape or general-purpose sealant to a precision fuel connection. Apply the prescribed torque and sequence with calibrated tools.
Prime the low-pressure system by the approved procedure. Do not use extended dry cranking to fill the system. Clear air, inspect for low-pressure leaks, and keep hands away from high-pressure components during operation. After starting, use scan data and safe visual methods to check the repair.
Verify pressure control under the original conditions
Repeat the same cranking, idle, warm-up, acceleration, and load conditions that revealed the complaint. Compare desired and actual pressure, pressure-control commands, engine speed, and relevant low-side measurements. Watch for overshoot, slow build, oscillation, or decay. Recheck codes after a complete operating cycle.
If contamination was present, perform every follow-up filter, sampling, or inspection step required by the manufacturer. If the old valve was damaged by excessive pressure, find why pressure control failed. If it opened because another component created abnormal pressure, replacing it without correcting the cause invites recurrence.
Create an auditable parts request
A professional RFQ should include machine model and serial, engine model and arrangement, rail number, old valve number, connector and sealing photographs, diagnostic codes, desired-versus-actual pressure graphs, low-pressure supply results, injector return results when specified, and contamination findings. State whether you need the valve alone, rail assembly, related line, or a wider fuel-system repair package.
Ask the supplier to confirm component function, identification basis, included seals, handling requirements, test documentation, warranty conditions, and packaging. The site’s diesel pump procurement guide provides further B2B identification fields.
Send the completed record through the Hongtengda parts inquiry page for written comparison. Keeping diagnosis, serial identification, supplier confirmation, clean installation, and post-repair data in one file is the best protection against both repeat failure and incorrect procurement.